Row
The edit row area contains a range of setting options, which are described below:
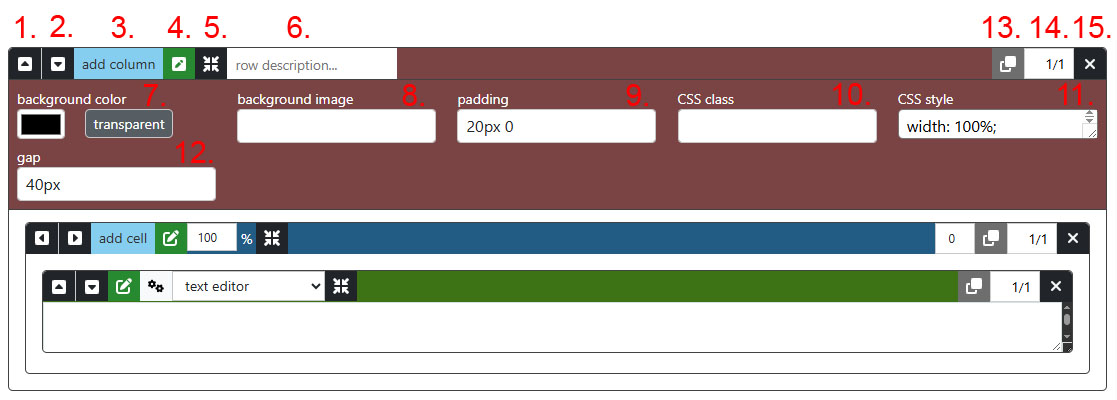
1. move row up
Move the row upwards.
2. move row down
Move the row downwards.
3. add column
Adds a column to the right at the end.
4. open / close edit row
Opens and closes this edit settings of the row.
5. minimize / entlarge row
Closes and opens the row. If you have several rows, you can get a better overview by closing the rows that you are not currently working on.
6. row description
A description of the row can be entered here. This is very useful for closed rows.
7. background color
The background color for the entire width of the row can be specified here. To remove this again, you can use the "transparent" button.
8. background image
The link (URL) to a background image for the entire width of the row can be specified here.
9. padding
With padding you can define the inner spacing in pixels.
The order is: top right bottom left
Examples:
- 25px 50px 75px 100px
- top padding is 25px
- right padding is 50px
- bottom padding is 75px
- left padding is 100px
- 25px 50px 75px
- top padding is 25px
- right and left paddings are 50px
- bottom padding is 75px
- 25px 50px
- top and bottom paddings are 25px
- right and left paddings are 50px
- 25px
- all four paddings are 25px
10. CSS class
CSS classes can be specified here.
11. CSS style
Individual CSS styles can be specified here.
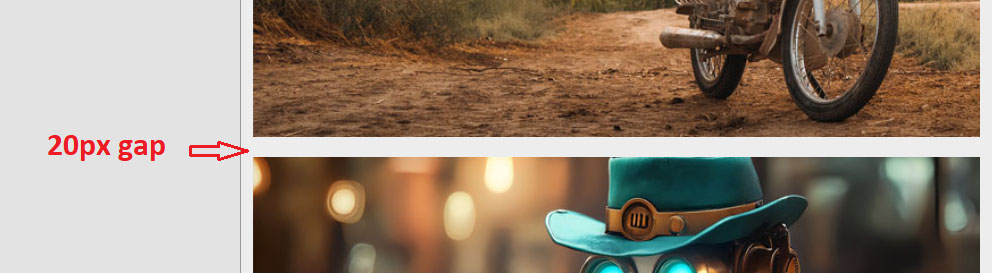
12. gap
With gap you can define the distance in pixels between rows and columns.
Example for: 20px 40px

13. dublicate this row
This button can be used to duplicate the row. It is appended at the end and can then be moved to the desired position using the up and down buttons.
14. order row
This is a display without function. It shows how many rows there are and the position of the corresponding row.
15. delete row
The row can be deleted with the button. The last row cannot be deleted. There must always be at least one row.
16. copy this row in clipboard
Use this button to copy the row if you want to paste it into another page. This allows you to transfer content from different pages. To paste the row, click the "Insert row from clipboard" button in the header of the other page.
17. hide row
This button lets you hide the row in the preview so you can see what the page would look like without it. This way, you don't have to delete the row manually. This setting is not saved and is intended solely for preview purposes.
Copy / Insert Row & Hide Row
new from version 1.2.0

A) insert row from clipboard & B) copy row to clipboard
If you want to duplicate a row on the same page, use the “duplicate this row” button (13).
However, if you want to transfer a row to another page, click on the "copy this row to clipboard" button (B), then switch to the other page and insert the row using the "insert row from clipboard" button (A).
Please note: once the row has been inserted, the clipboard is automatically emptied to free up resources. If you want to insert the row again, you will need to copy it once more.
C) hide row
If you want to see what the page looks like without the corresponding row, click on the C "hide row" button.
This row will then not be displayed in the preview (but will remain visible in the edit area).
This change will not be applied when the page is saved.
Please note: Neither "display: none" in the CSS style nor a class with this specification may be present in the row settings.